7 Riverview Drive, Guelph, Ontario, N1E 3R6,
Canada
Mon: 10:00am - 7:00 pm
Tu/W: 8:00am - 5:00 pm
Thur: 9:00am - 4:00 pm
Fri - Sat 9:00 am - 3:00 pm (alternating)

Replacement of aged composite bonding step by step using the Dr. Puri Protocol.
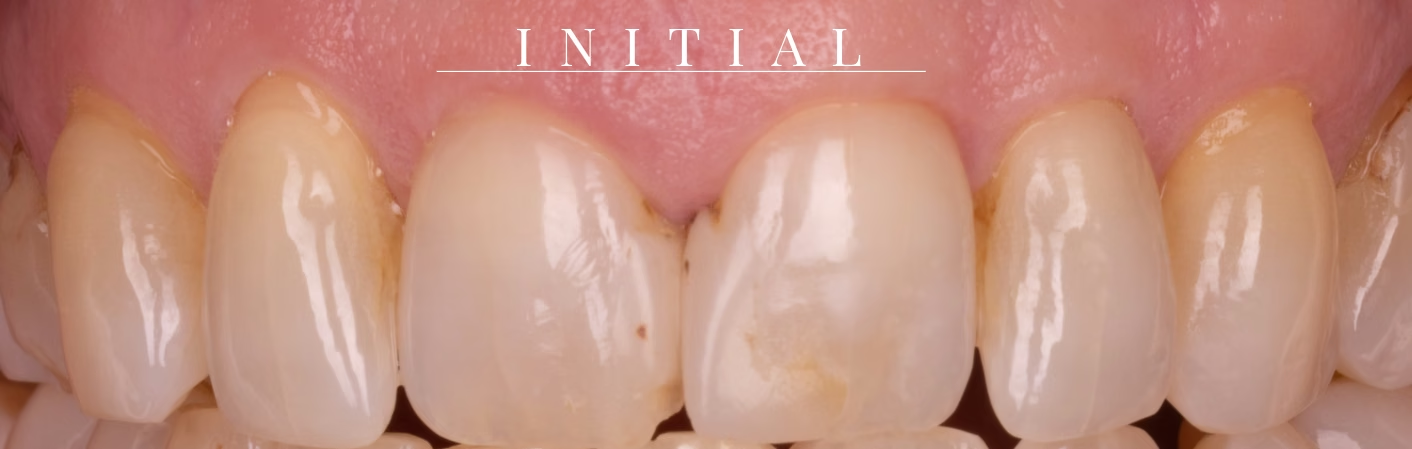
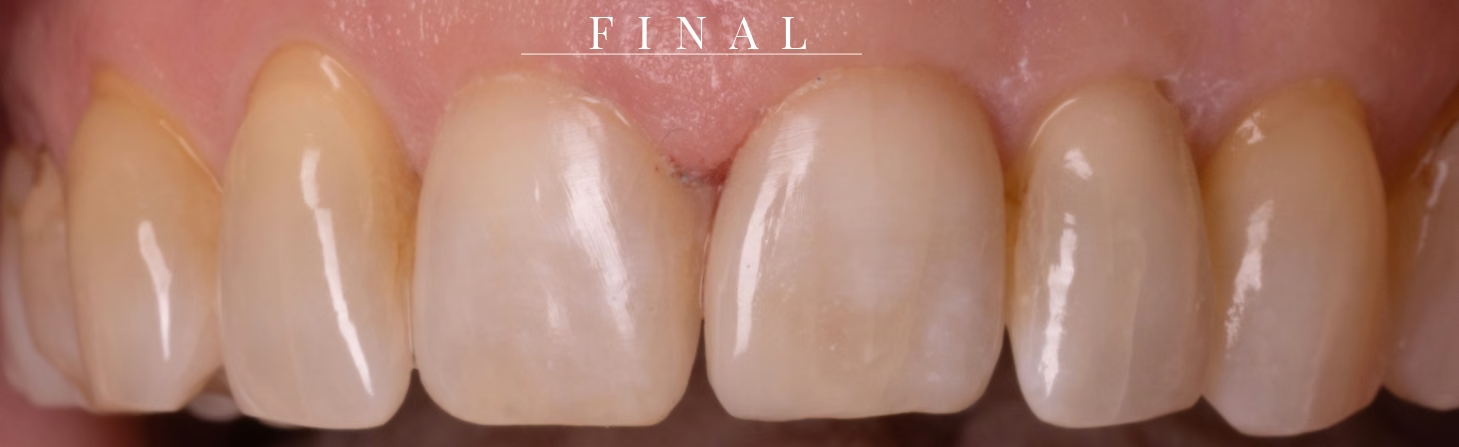
This patient had a front tooth gap closed with composite bonding roughly 7 to 10 years earlier, and the restoration had begun showing multiple signs of failure. There was marginal leakage, visible as dark lines forming along the edges of the filling where it had started lifting from the tooth surface, along with discolouration, chipping and recurrent decay at the base of the restoration.
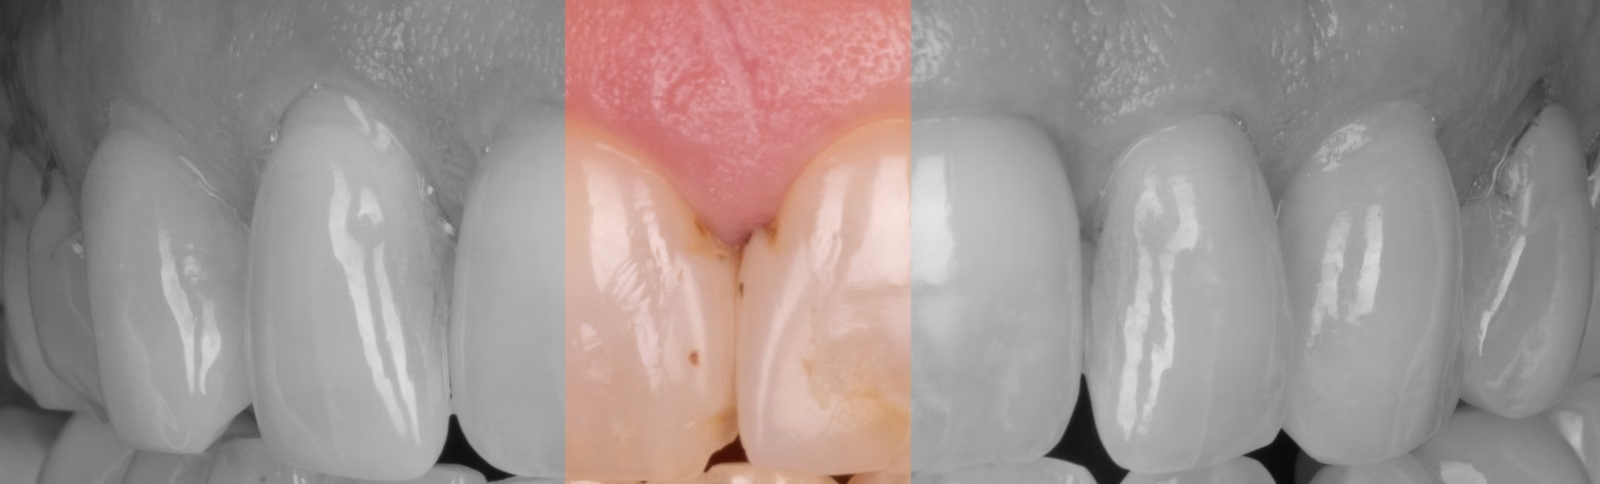
The plan ran in a deliberate sequence:
1) Review the patient's goals and expectations, and the limitations of composite bonding against the alternatives were crowns, veneers or orthodontics.
2) Assess the teeth for nerve vitality, pathology and gum (periodontal) health.
3) Remove the existing composite bonding.
4) Evaluate and treat any decay found beneath the restoration. Its full extent cannot be known until the old bonding is off.
5) Restore the front teeth, balance the bite and polish.
6) Identify and address anything that contributed to the breakdown: grinding and clenching (bruxism), habits, diet, hygiene and how the bite loads the restoration.
The old composite was removed in stages with the assistance of air abrasion and limited irrigation, so the boundary between filling and tooth stayed visible throughout and minimal to no natural tooth was removed.
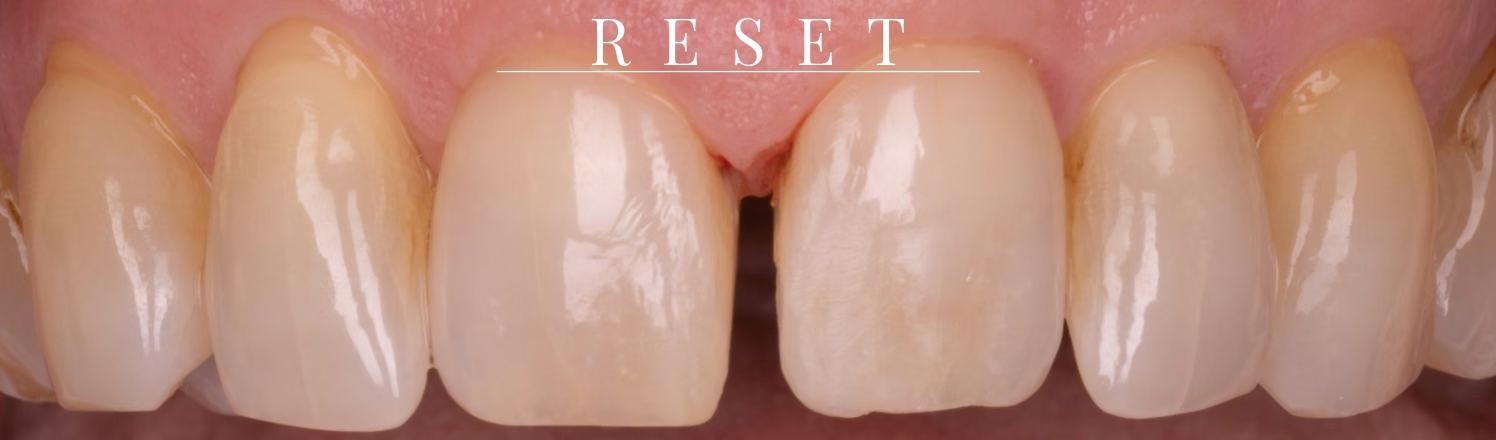
Decay along the cervical margin, the base of the tooth near the gumline, was then removed, and the restoration was rebuilt following the same anterior bonding protocol detailed step by step in our composite bonding case study: isolation, air abrasion and etching, then a layered build-up of body composite, tints and stains, and a polishable microfill surface layer.
The final restoration was assessed critically under several lighting conditions for form, colour and texture, with further small adjustments and a final polish completed before the patient left.
Post-operative instructions for maintaining the bonding were provided, and an upper (maxillary) night guard was made to protect the new restoration from the grinding and clenching forces that contributed to the previous bonding's breakdown.
Individual results vary; how long bonding lasts depends on your bite, your habits and how the restoration is maintained. This page documents a clinical case treated by Dr. P and is not individual dental or medical advice, please consult your dentist or physician for advice specific to you.
Sunny Dental Centre is a general dental practice. Dr. Mandip Puri, DDS, is registered with the Royal College of Dental Surgeons of Ontario as a general practitioner, not a specialist.
Individual results vary. This case illustrates work completed at Sunny Dental Centre and is shared with written patient consent. What is achievable in your own case depends on your teeth, your bite and your goals. Sunny Dental Centre is a general dental practice; Dr. Mandip Puri, DDS, is registered with the Royal College of Dental Surgeons of Ontario as a general practitioner, not a specialist.
Every case is different. Book a consultation and we will tell you what is realistic for your teeth.
7 Riverview Drive, Guelph, Ontario, N1E 3R6,
Canada
Mon: 10:00am - 7:00 pm
Tu/W: 8:00am - 5:00 pm
Thur: 9:00am - 4:00 pm
Fri - Sat 9:00 am - 3:00 pm (alternating)