7 Riverview Drive, Guelph, Ontario, N1E 3R6,
Canada
Mon: 10:00am - 7:00 pm
Tu/W: 8:00am - 5:00 pm
Thur: 9:00am - 4:00 pm
Fri - Sat 9:00 am - 3:00 pm (alternating)


The short version. A gap between the two upper front teeth that was trapping food and irritating the gum. It was closed in a single visit with composite bonding, material added to the teeth rather than drilled into them, with no braces and minimal to no removal of healthy enamel. The full case, including the smile design and the layering protocol, is below.
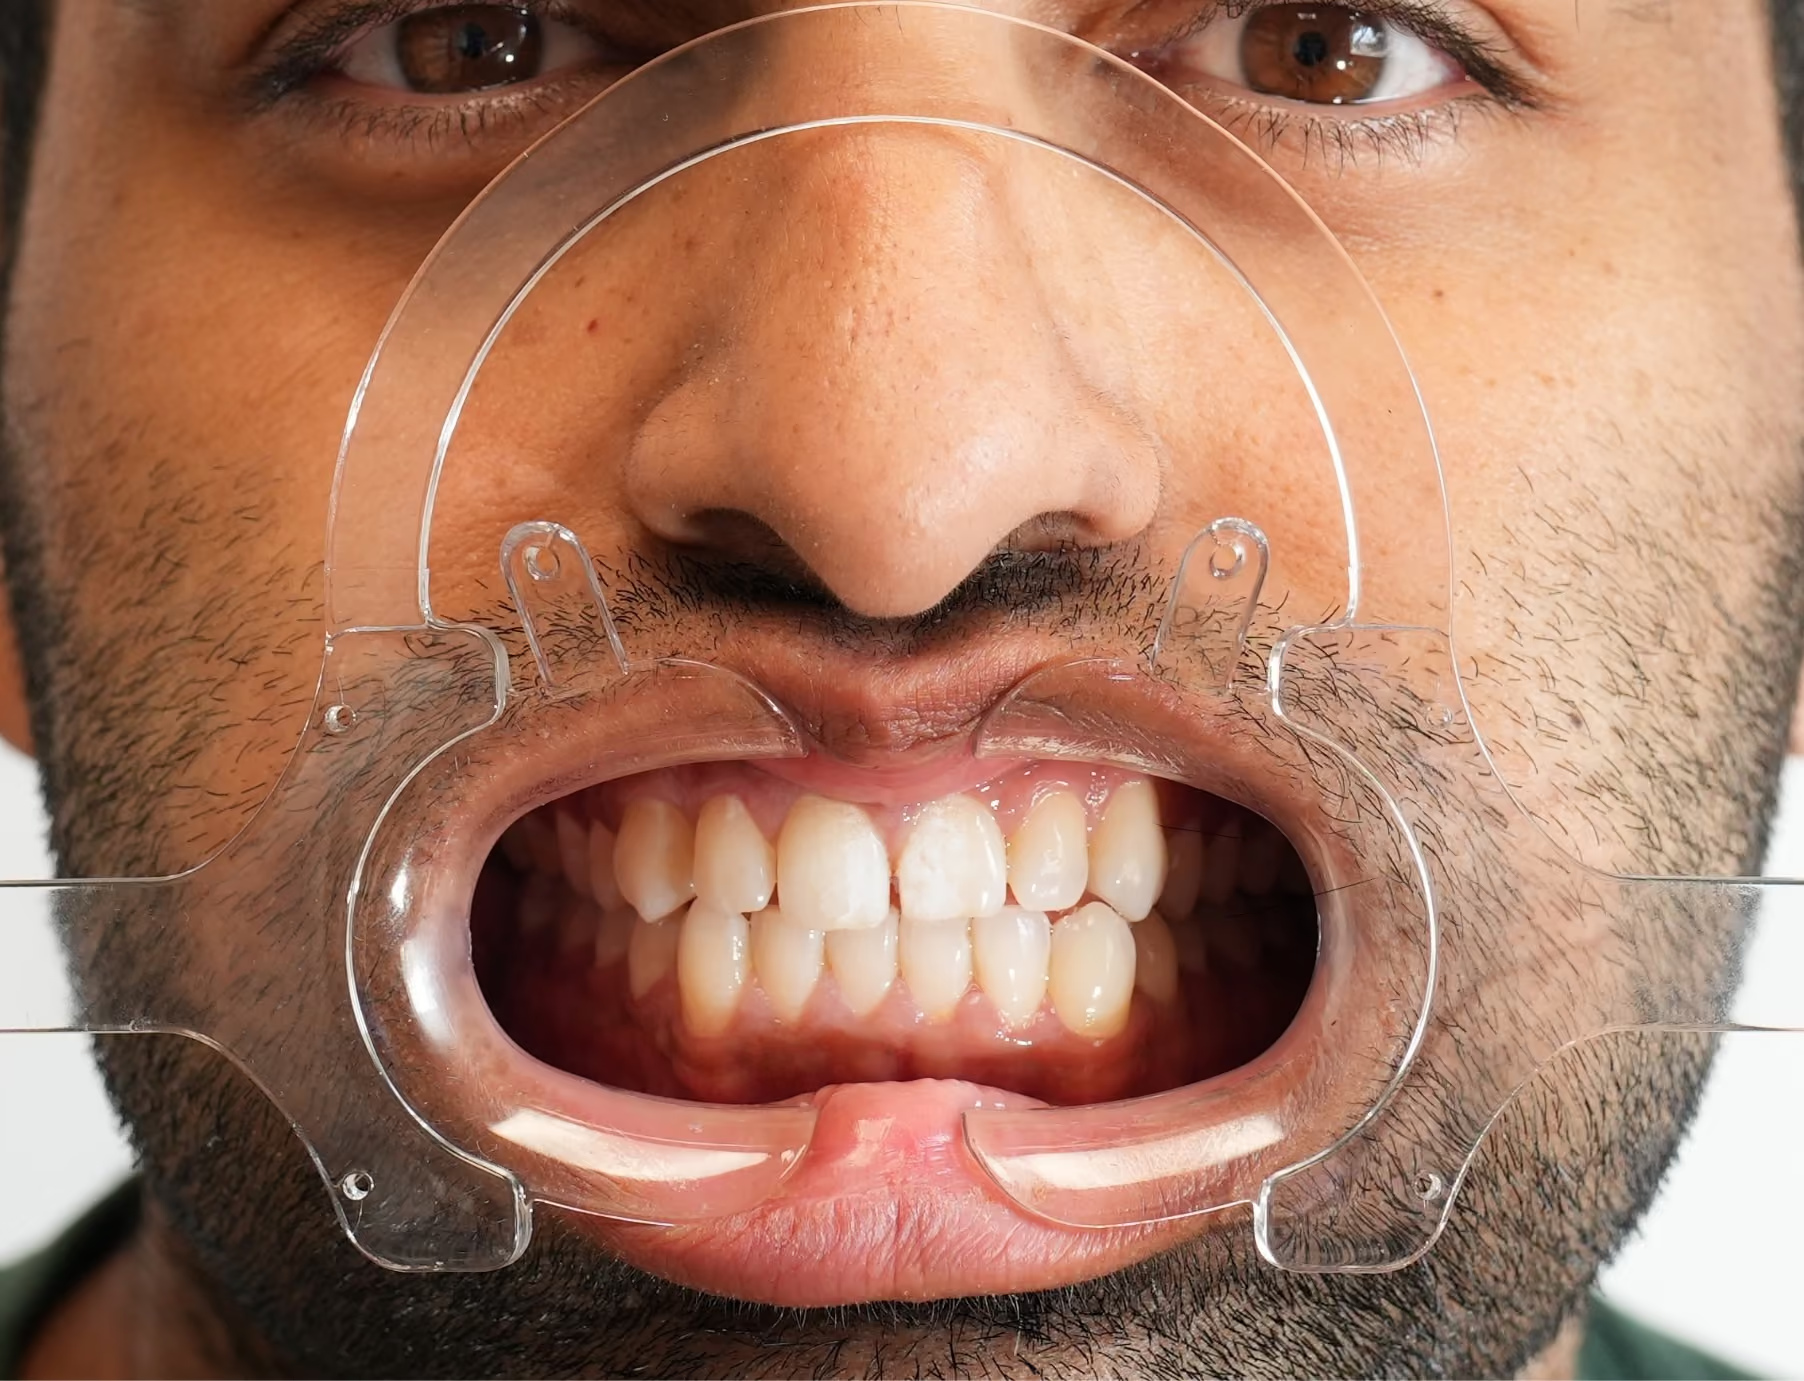
A gap between the two front teeth, known as a diastema, can often be closed in a single visit using composite bonding, with minimal to no removal of natural tooth structure. In this case study we work through a diastema closure using the protocol I have fine tuned over my career as a cosmetic dentist. The patient, a male, presented with a space between his two front teeth which led to food impaction and tissue trauma. The goal was to close the gap using dental materials chosen to look natural and with good care, hold up well over time, without braces and without drilling away healthy enamel.
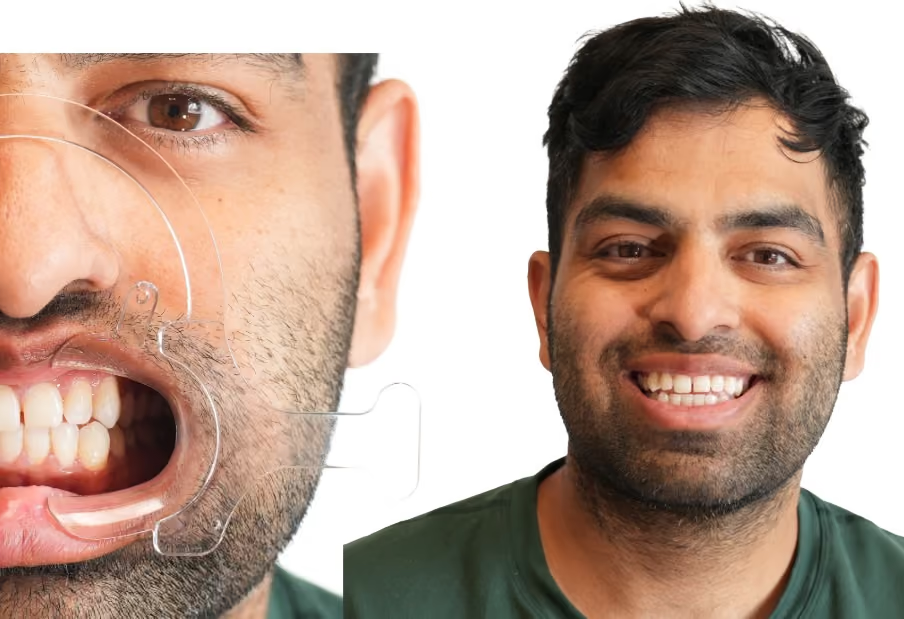
In my professional opinion, the consult and smile design are among the most important aspects of an anterior dental procedure. During the consult we identify the chief complaint and concerns, establish goals and limitations, and create a plan of action. In this case our goal was to close the front tooth space while maintaining a natural appearance.
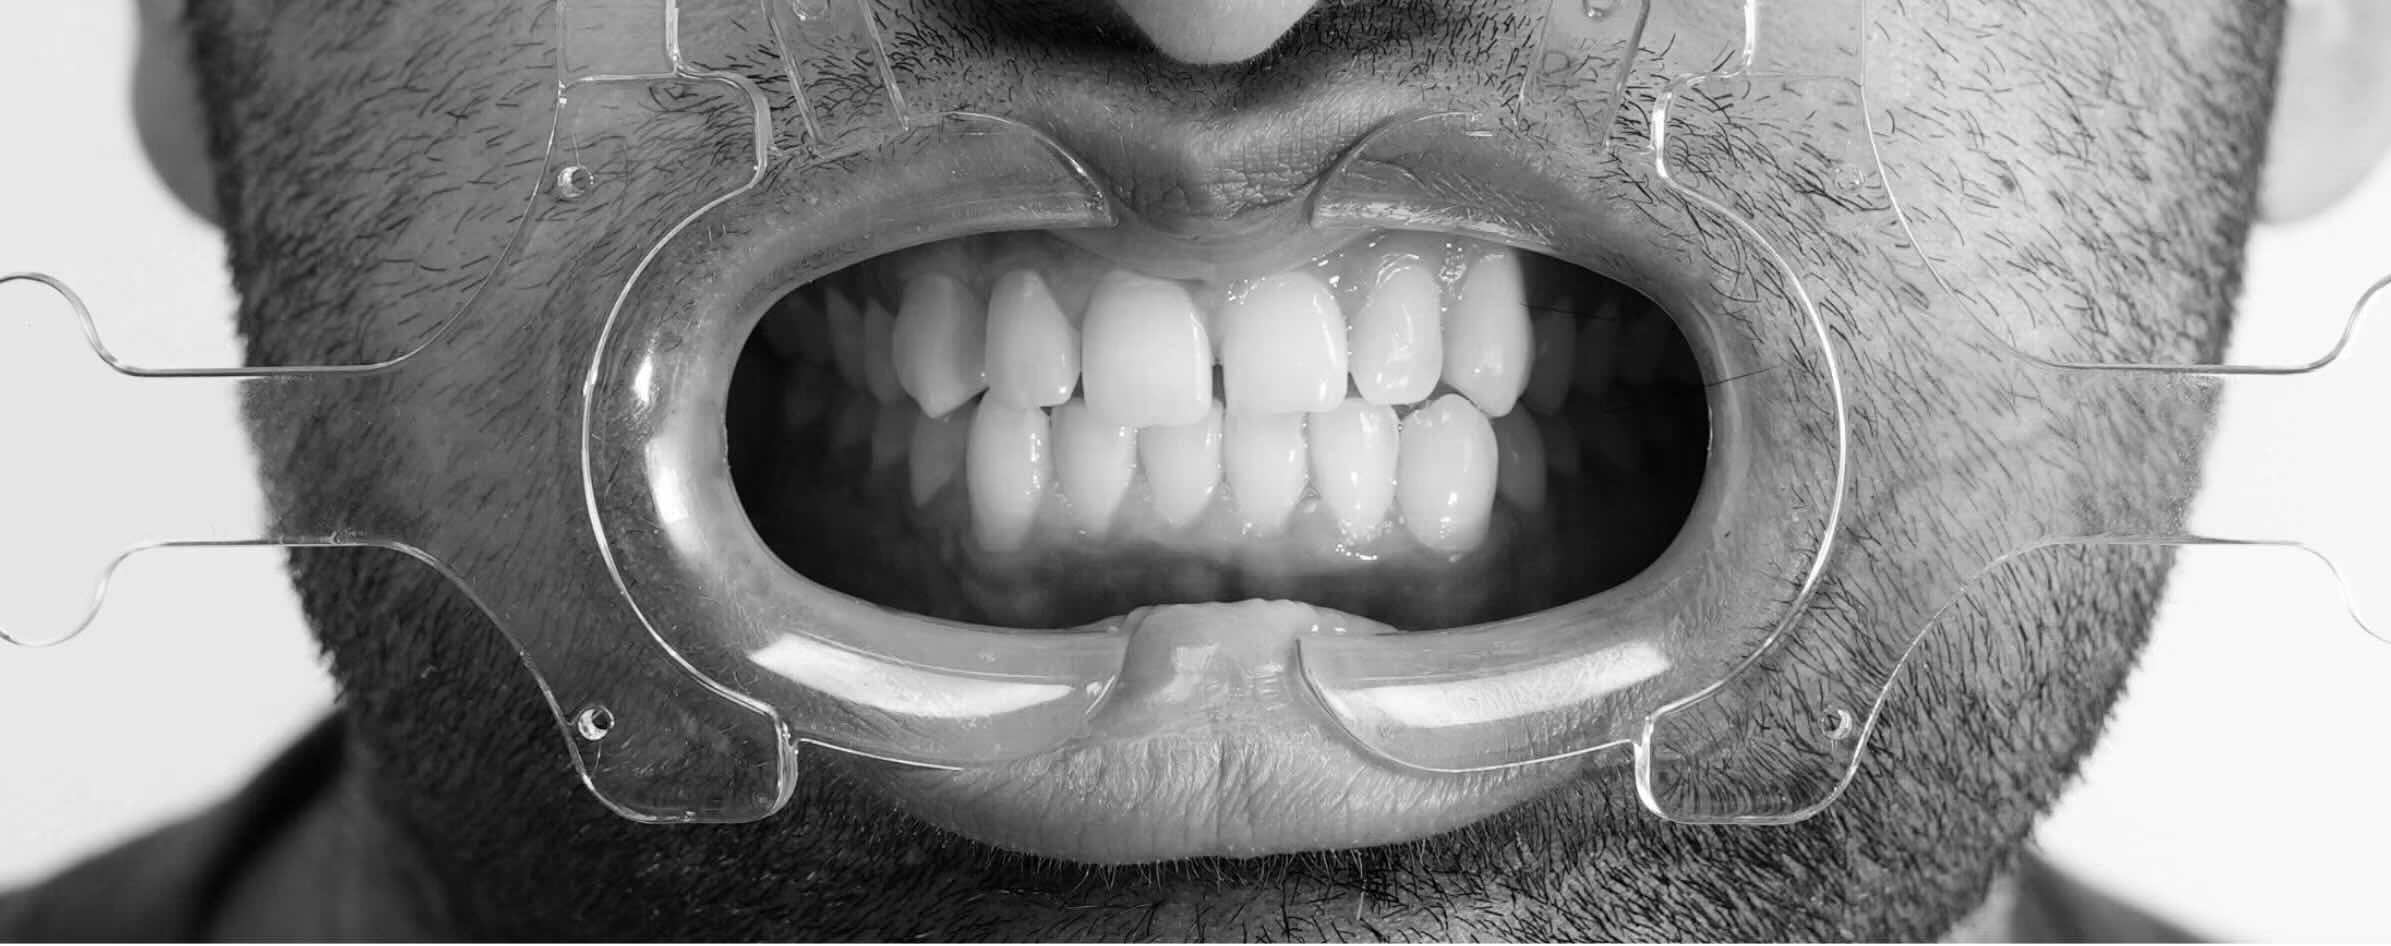
Colour, shape and texture. Two of the most important factors in any front tooth work are the colour and shape of the final restoration. This holds true whether it is a crown, a veneer, or a composite restoration. A black and white image helps identify textural elements, the brightness of different aspects of the teeth, and how light reflects along the surface. We then use this as part of a map to create the final restoration design.
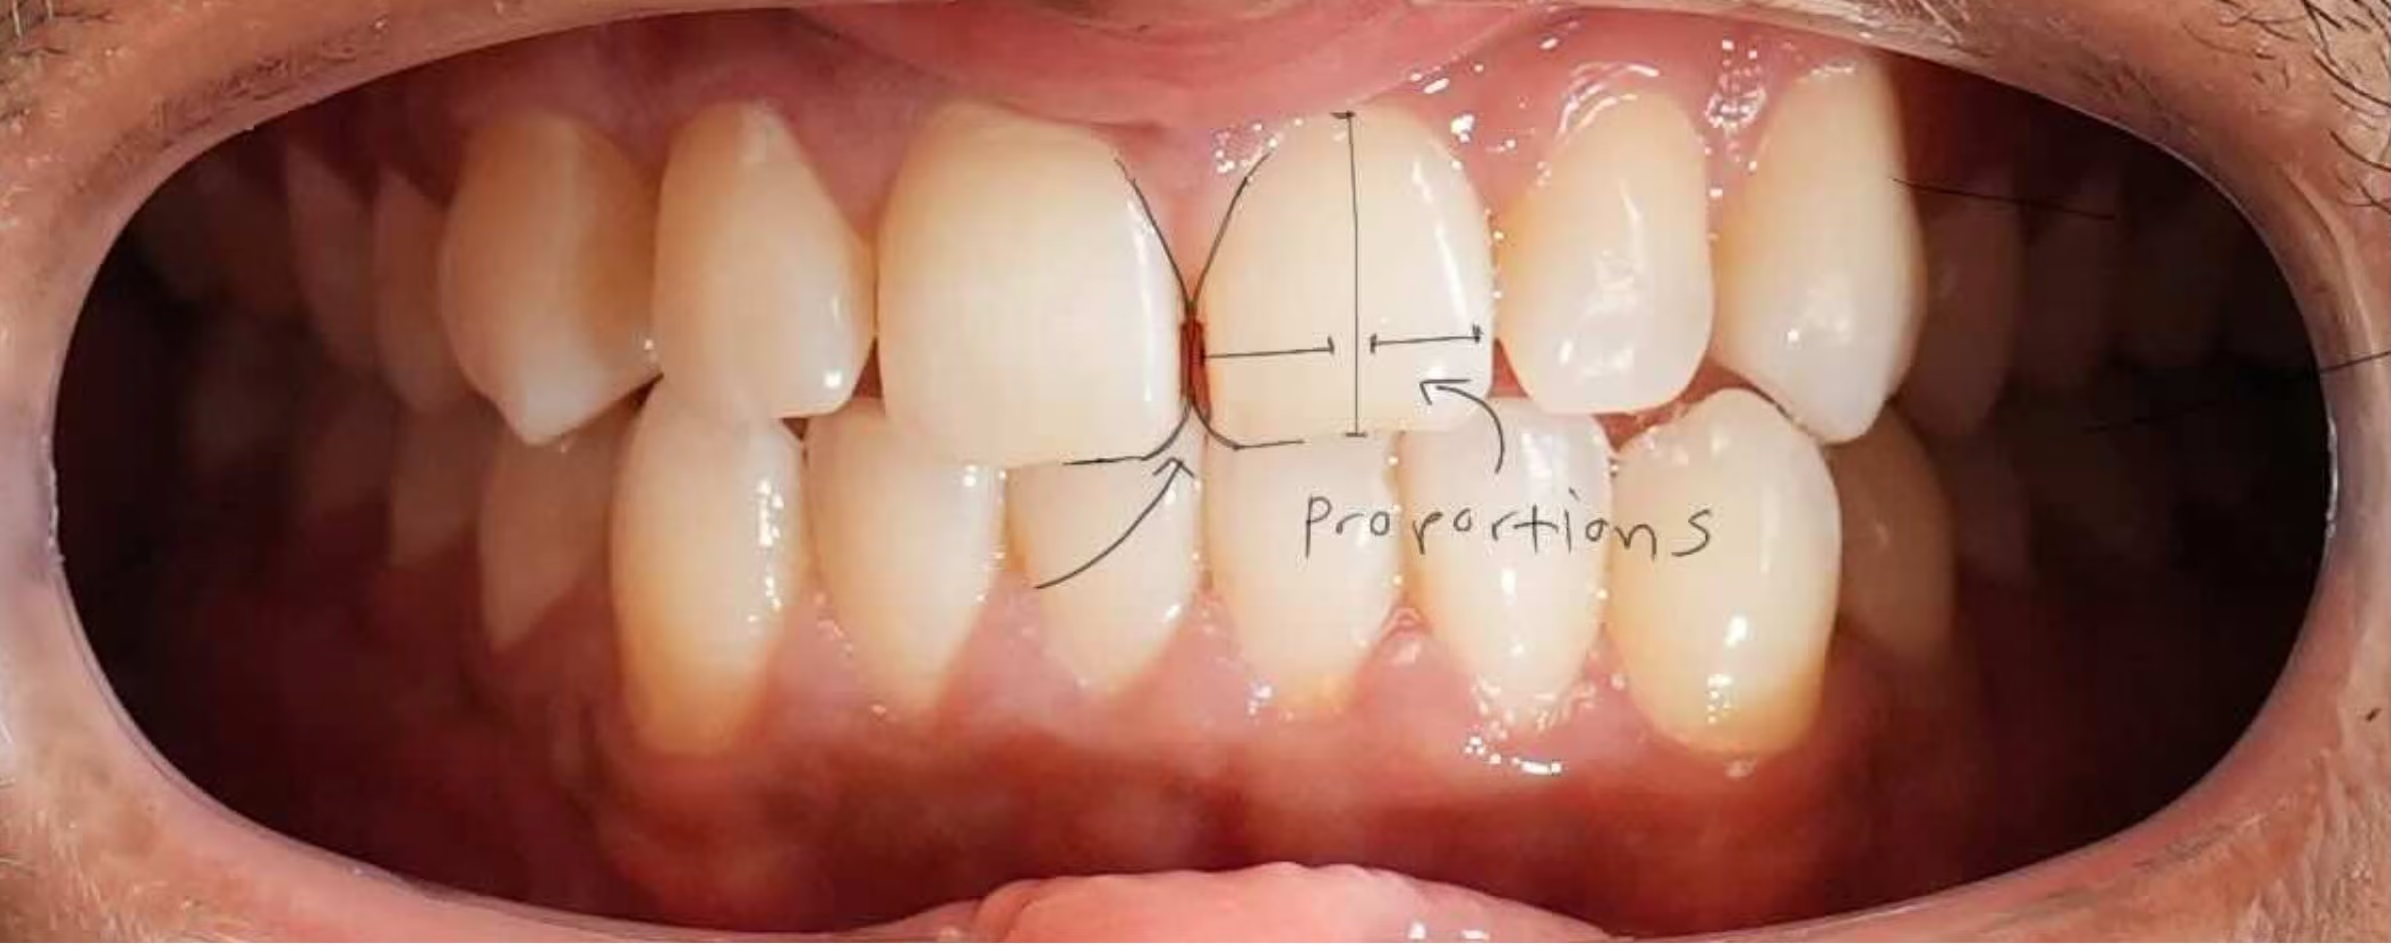
Smile design and restoration design. Smile design involves the assessment of the proportions, shape, bite and colour of a patient's teeth and smile. It is one of the most important parts of any cosmetic dentistry procedure and acts as the blueprint for the procedural work. It involves an in depth visual assessment under various lighting conditions and can include photographic analysis, a digital scan, or a physical mold which is used to create a mock up smile for clinical planning. Depending on the complexity of the case, the type of records used and the level of planning vary dramatically.
In this case we began with a digital scan and high quality photos, which were used to plan the shape and design of the restorations according to the patient's goals. As part of the smile design analysis we identified:
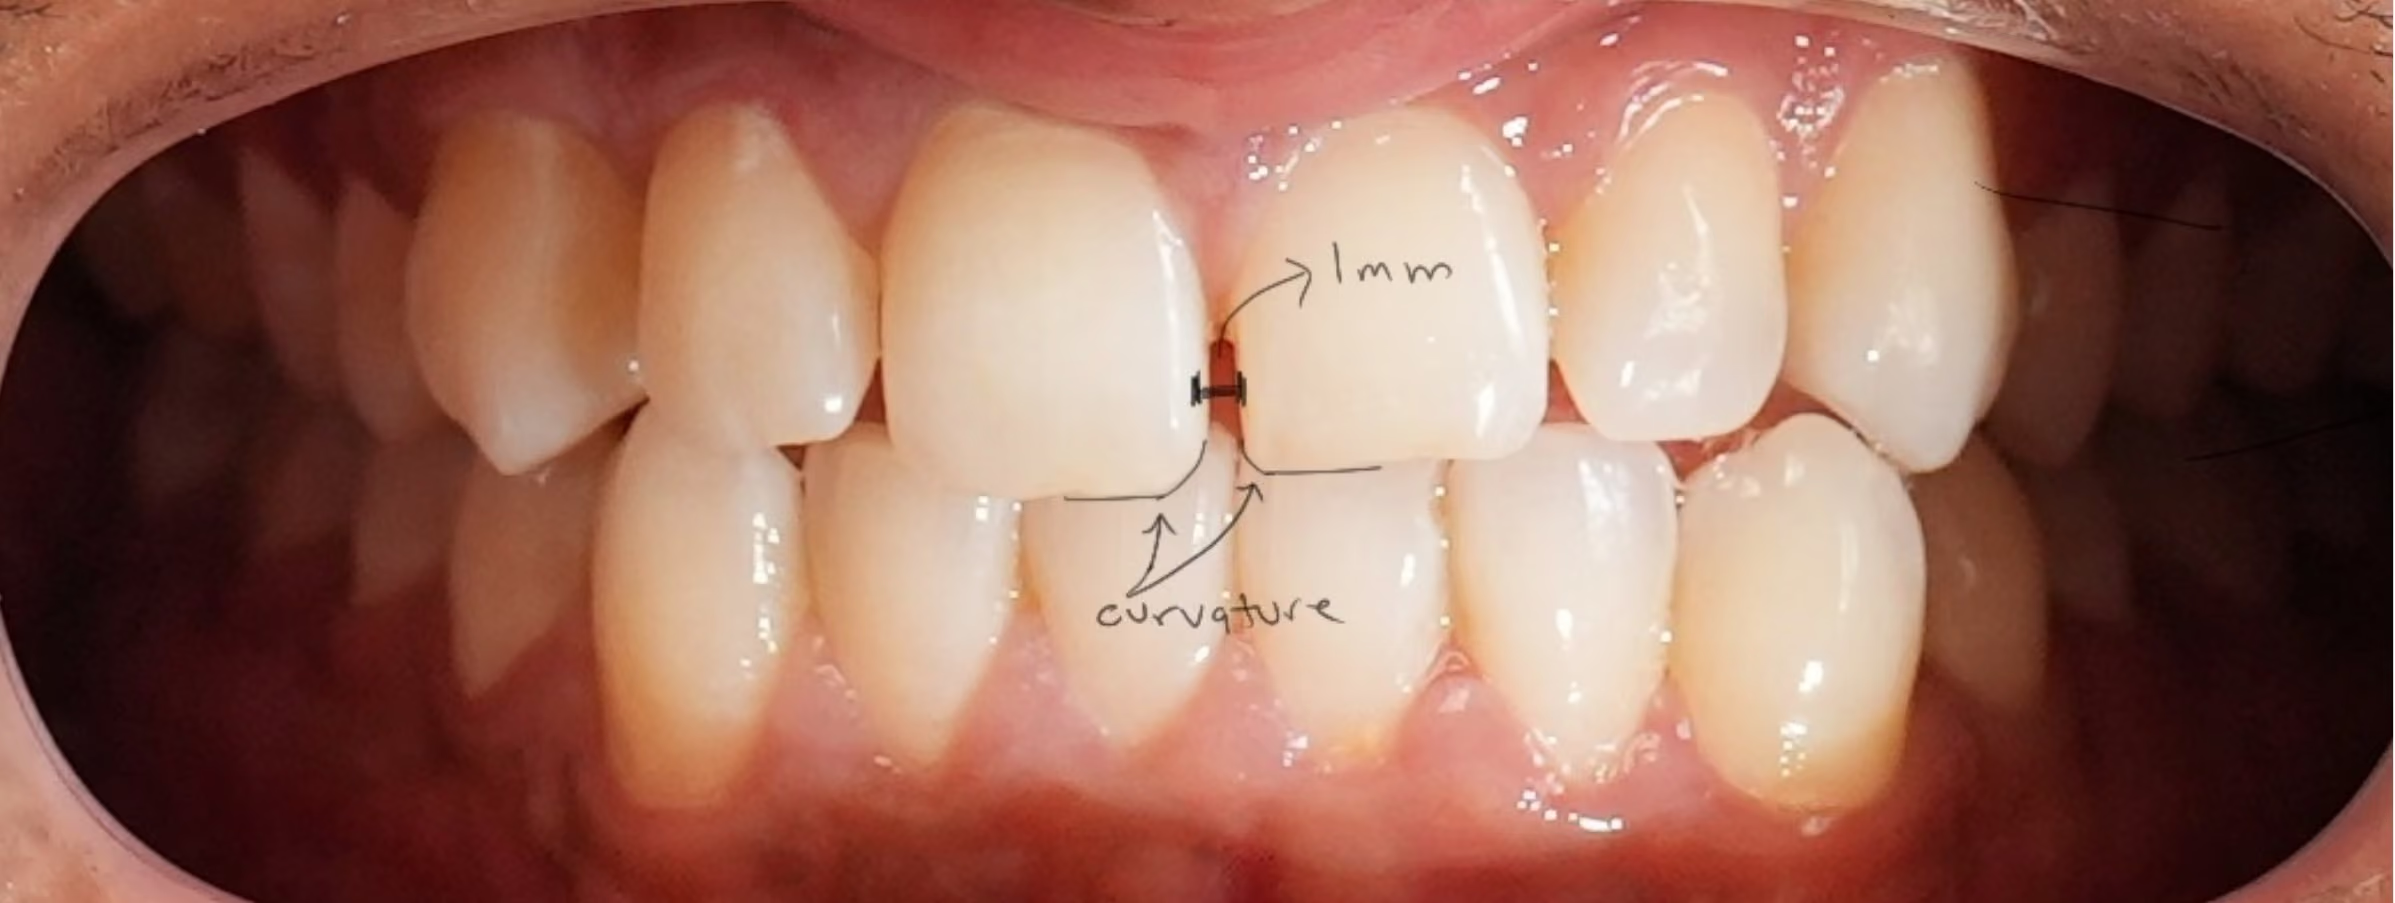
My goal as a dentist is to make sure the dentistry meets the needs of the individual. In this case the patient wanted to maintain certain imperfections. Why would someone do this? To help the smile appear as natural as possible.
Here you can better see the variation in the curvature of the edges, shapes and height of the two teeth being modified. When closing a front tooth space, I measure the distance which is being closed. This is extremely important because if the gap is 2.5 to 3 mm or greater, closing a diastema can appear unnatural without also modifying the tooth height or the remaining teeth. Each tooth has proportions which are common. For the middle two teeth, better known as the central incisors, the width to height ratio usually falls within 75% to 85%. If the gap in this case had been substantial, we would have needed to consider altering the adjacent teeth, modifying tooth height, or orthodontics.
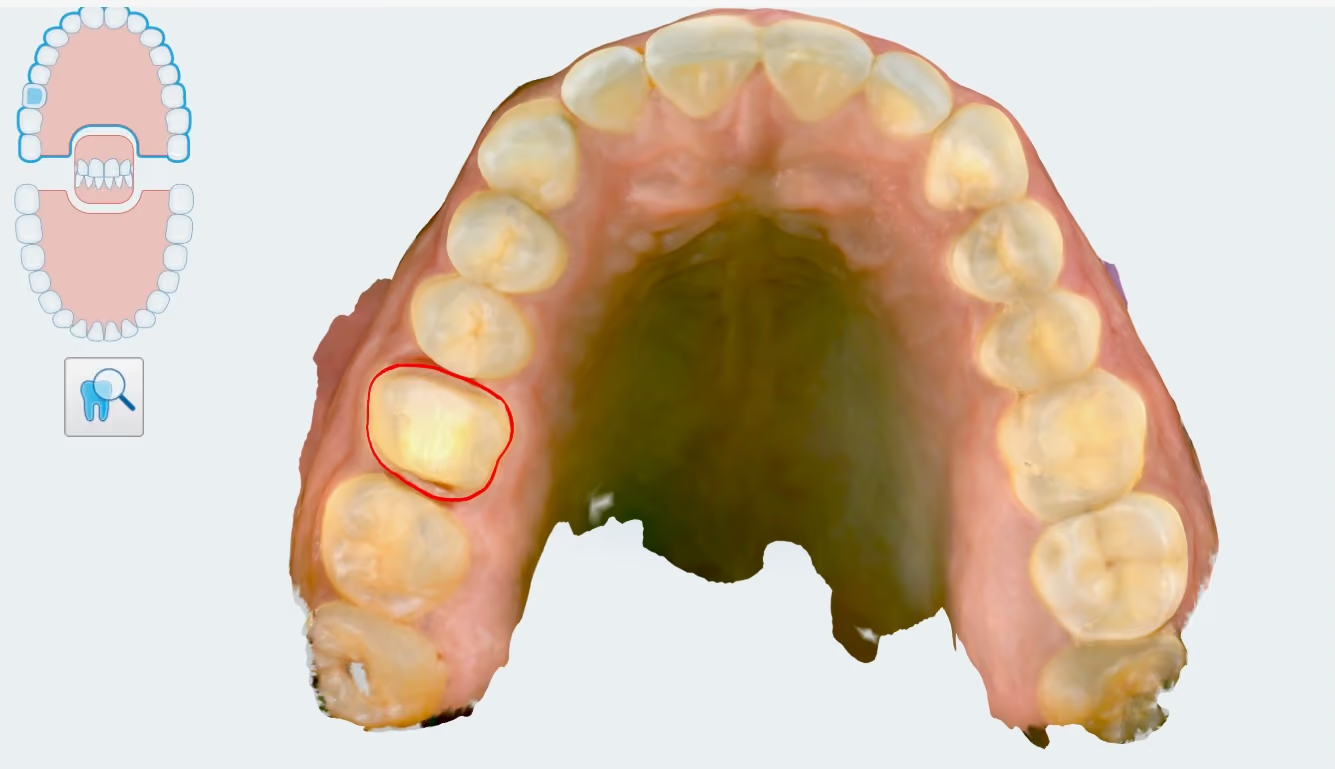
When the lengths of the teeth need to be changed and multiple teeth are involved, a procedural guide is fabricated using a digital scan. This guide serves as a template which is used to shape the edges of the newly formed restorations and their heights, and to balance the occlusal forces. The scan also helps us better understand the bite. In some cases bites can be traumatic and produce excessive forces on the bonding. In that case, adjustments are made to the design of the composite bonding and the bite is balanced, a procedure called occlusal equilibration.
Procedurally, composite bonding can be primarily additive, meaning there can be minimal to almost no tooth removal. Here are the steps taken in this case:
Isolation of the tooth. This is one of the most important steps in any restorative dentistry procedure. The long term longevity of the composite bonding, and protection against staining at the edges of the filling (the margins), depends on two primary factors: the quality of the isolation and the bonding protocol. In this case a rubber dam and high volume suction were used. Note: How the restoration is refined and polished also impacts staining substantially.
Roughening of the enamel. The enamel, or the outer layer of the tooth, is not removed. Instead it is gently scratched to increase the surface area for bonding. With veneers, the outer layer of the tooth is commonly removed to create space for the porcelain material. This is not required for bonding.
Air abrasion. I also prefer to air abrade the scratched surfaces with aluminum oxide, which is analogous to sand blasting. This further increases the surface area for bonding and creates micro retention. Visually it creates the chalky appearance you can see in the image.
Etching. The air abraded surface is then etched with 37% phosphoric acid for 20 seconds and rinsed copiously with water. This again increases the surface area for bonding. As you can see, preparation of the tooth surface is extremely important for the long term longevity and success of the bonding.
Bonding agent. The prepared surface is then coated and air dried with a dental bonding agent. These can vary dramatically in their formulations and not all bonds are engineered for composite bonding. In our case we use a bonding agent which has very good bond strength to enamel, given that we are bonding only to the outer layer of the tooth.
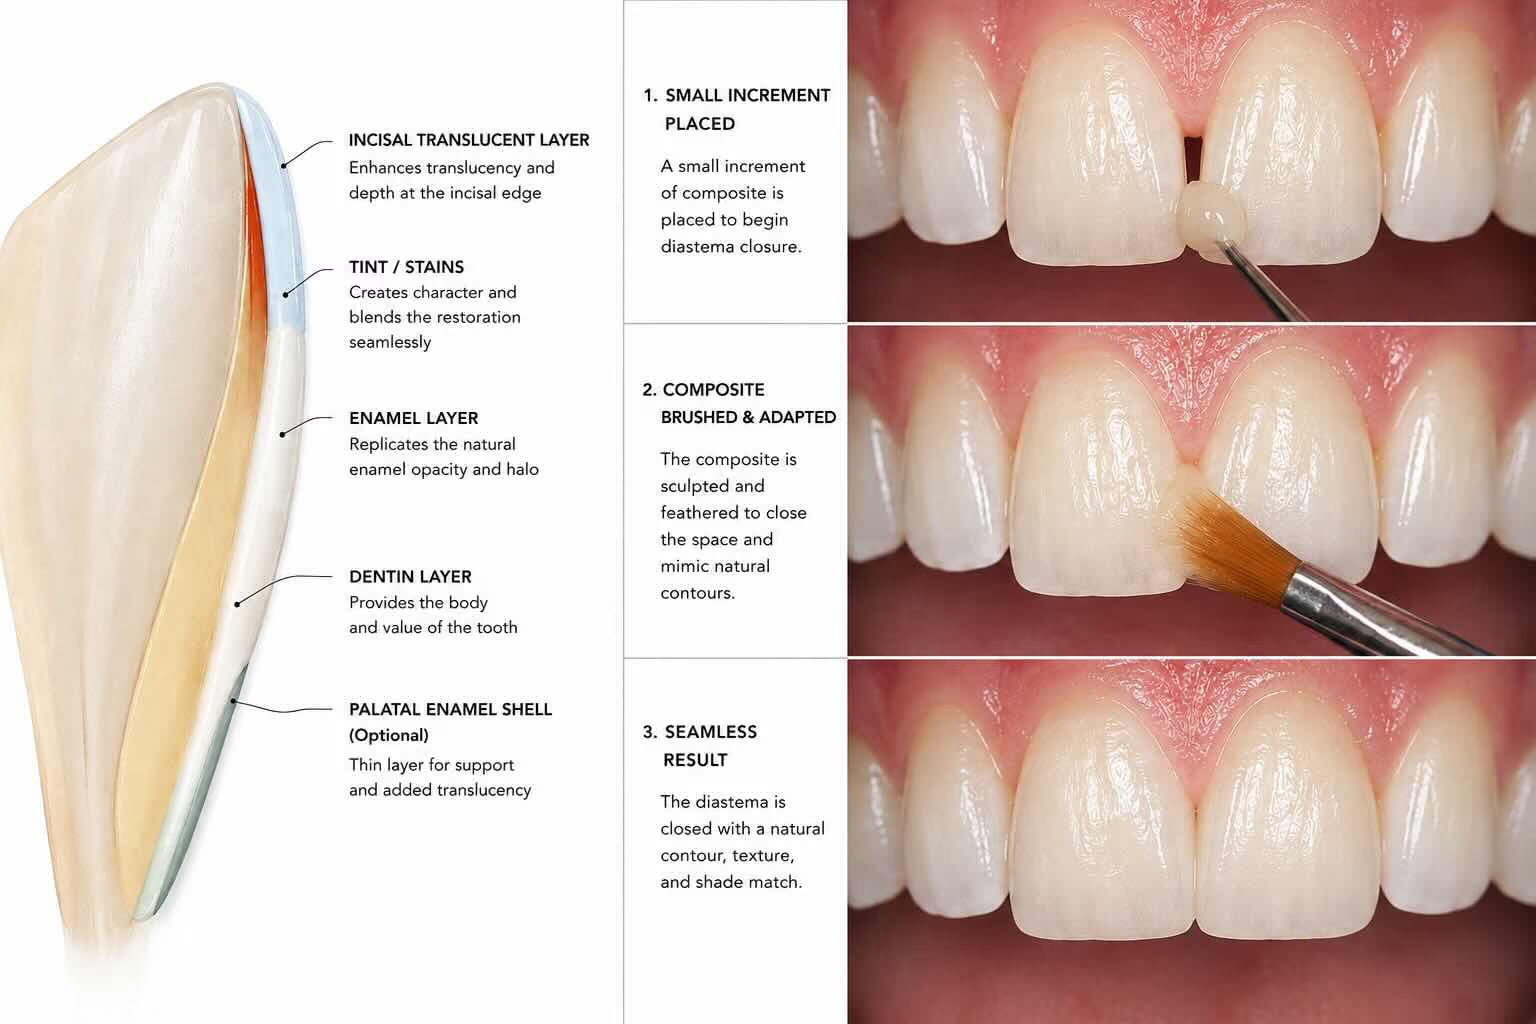
Layering. The composite is layered manually, increment by increment, with guides and matrices to help ensure appropriate shape and contour. It is then manually adjusted and polished to a natural tooth form. It is important to note there are various types of composites that can be used, each with different compositions and properties. In this case we used three different filling materials in three separate layers. First, a microhybrid body composite is placed for depth and strength. This is followed by a layer of stains and tints to recreate natural features and colours, then a semi translucent enamel layer which recreates certain properties of teeth such as opalescence and translucency. Finally, a translucent microfill layer is applied and polished. This final layer allows for life like polishability and shine retention. At Sunny Dental Centre, for demanding cosmetic cases, specific composites from Cosmodent are and Tokuyama are used. These composites are reserved only for front tooth cases. The composites are cured multiple times and a final cure is completed with a layer of glyercin to remove the oxygen inhibition layer.
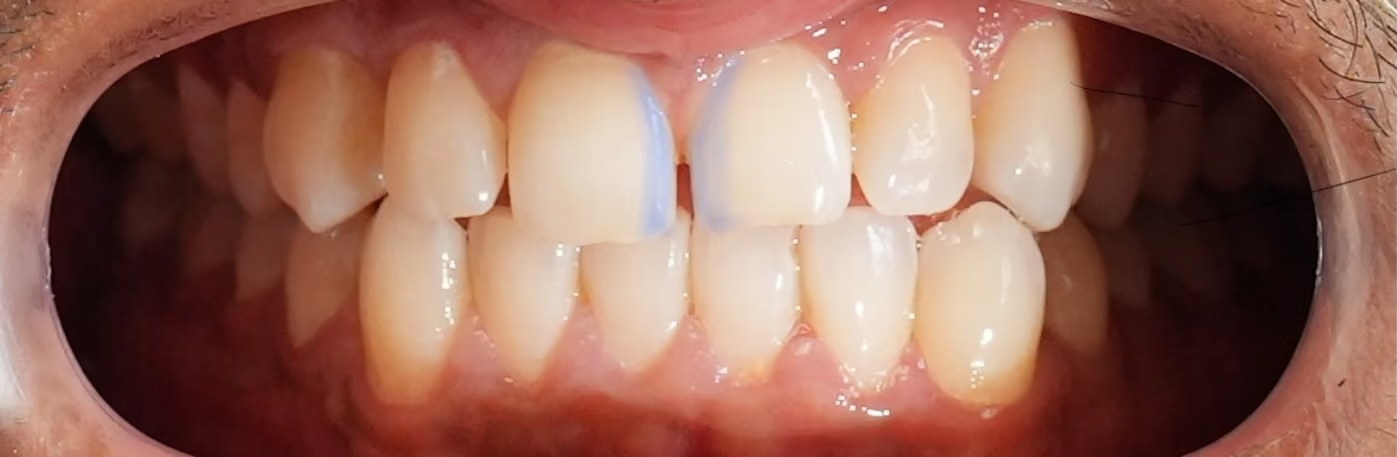
Composite bonding can incorporate a considerable degree of artistry. Each dentist who performs bonding uses varying techniques, tools and movements to layer and shape the final tooth. Personally, I use tools and techniques which draw from my background in art, in particular clay molding, sculpting and painting. Among my favourite tools are the pencil, which I use to continuously outline shapes, and light cured tints, which resemble paints. These paints allow for the application of characteristics such as white spots. They can mask areas of darkness and recreate complex details among the bonded teeth. For instance, blue or grey can be added along the edges of the teeth to recreate a youthful or mature look respectively, and ochre can be added along the base of the bonding to recreate warmth.
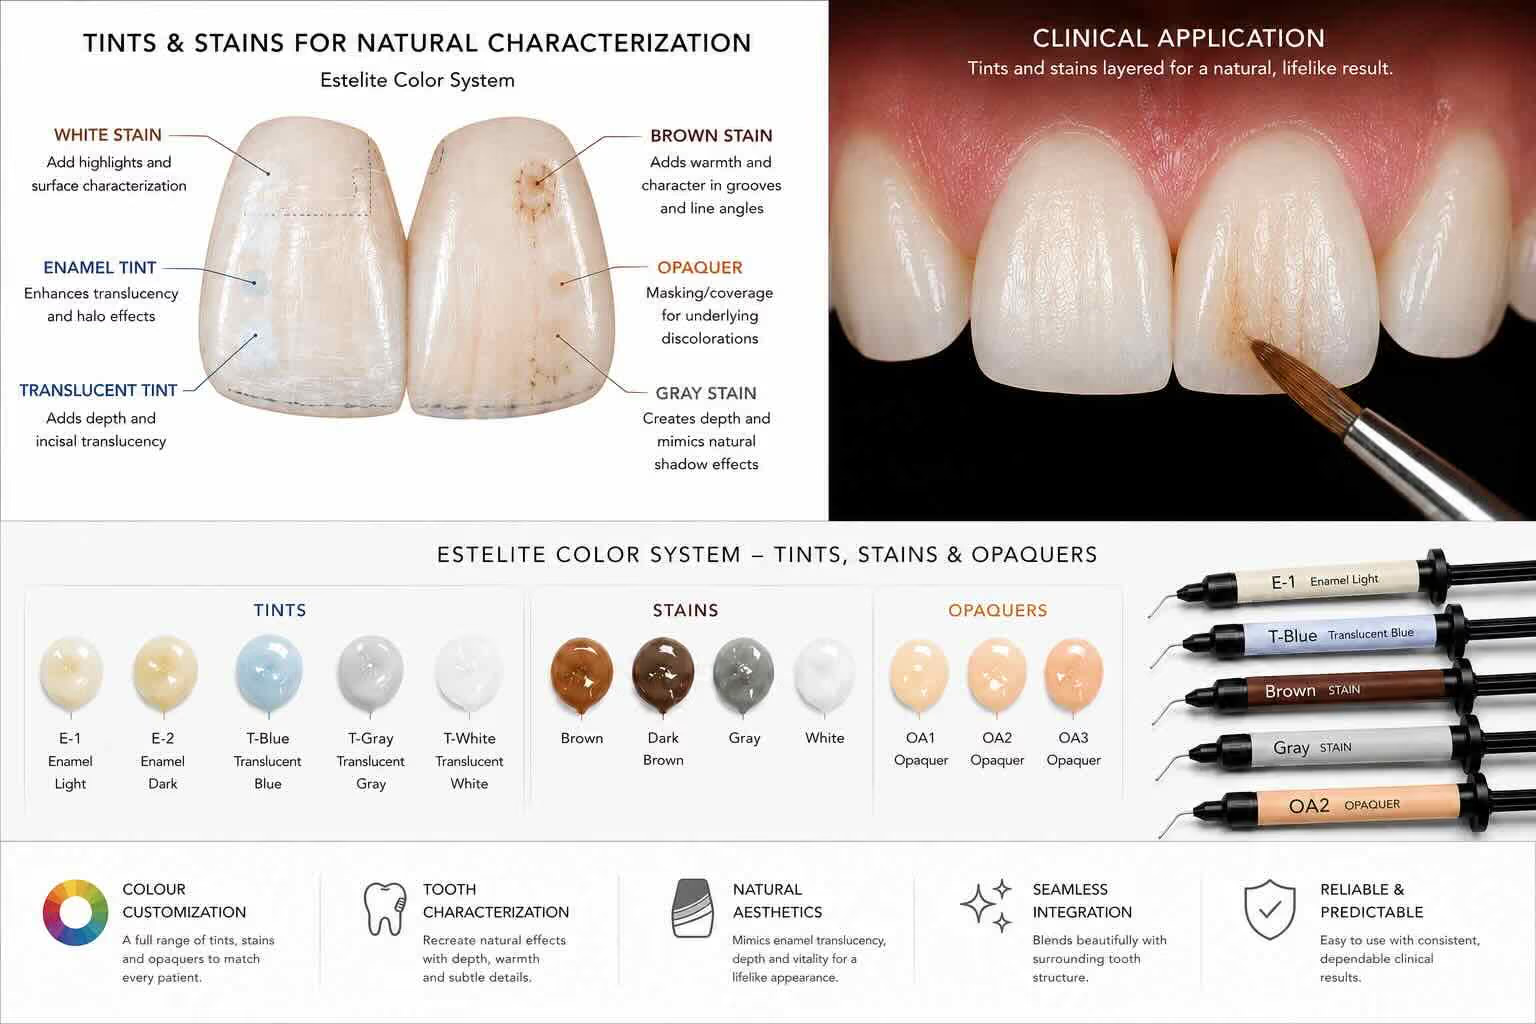
Here the final restoration was polished with a series of diamond impregnated rubber and felt wheels, followed by a series of diamond pastes, until a level of polish, lustre and shine similar to the adjacent teeth was achieved. It is important to assess how light reflects across the restoration. This is impacted by factors such as the extent of polish, the positioning and size of the lip, and the shape and size of the restoration.
Routinely during the polishing phase I will re-assess the appearance of the restoration and the patient's smile in natural light. During this time I will readjust the shape and line angles of the restoration, or produce different levels of lustre along the bonding, to allow for a natural reflection of light and consequently a natural appearance.
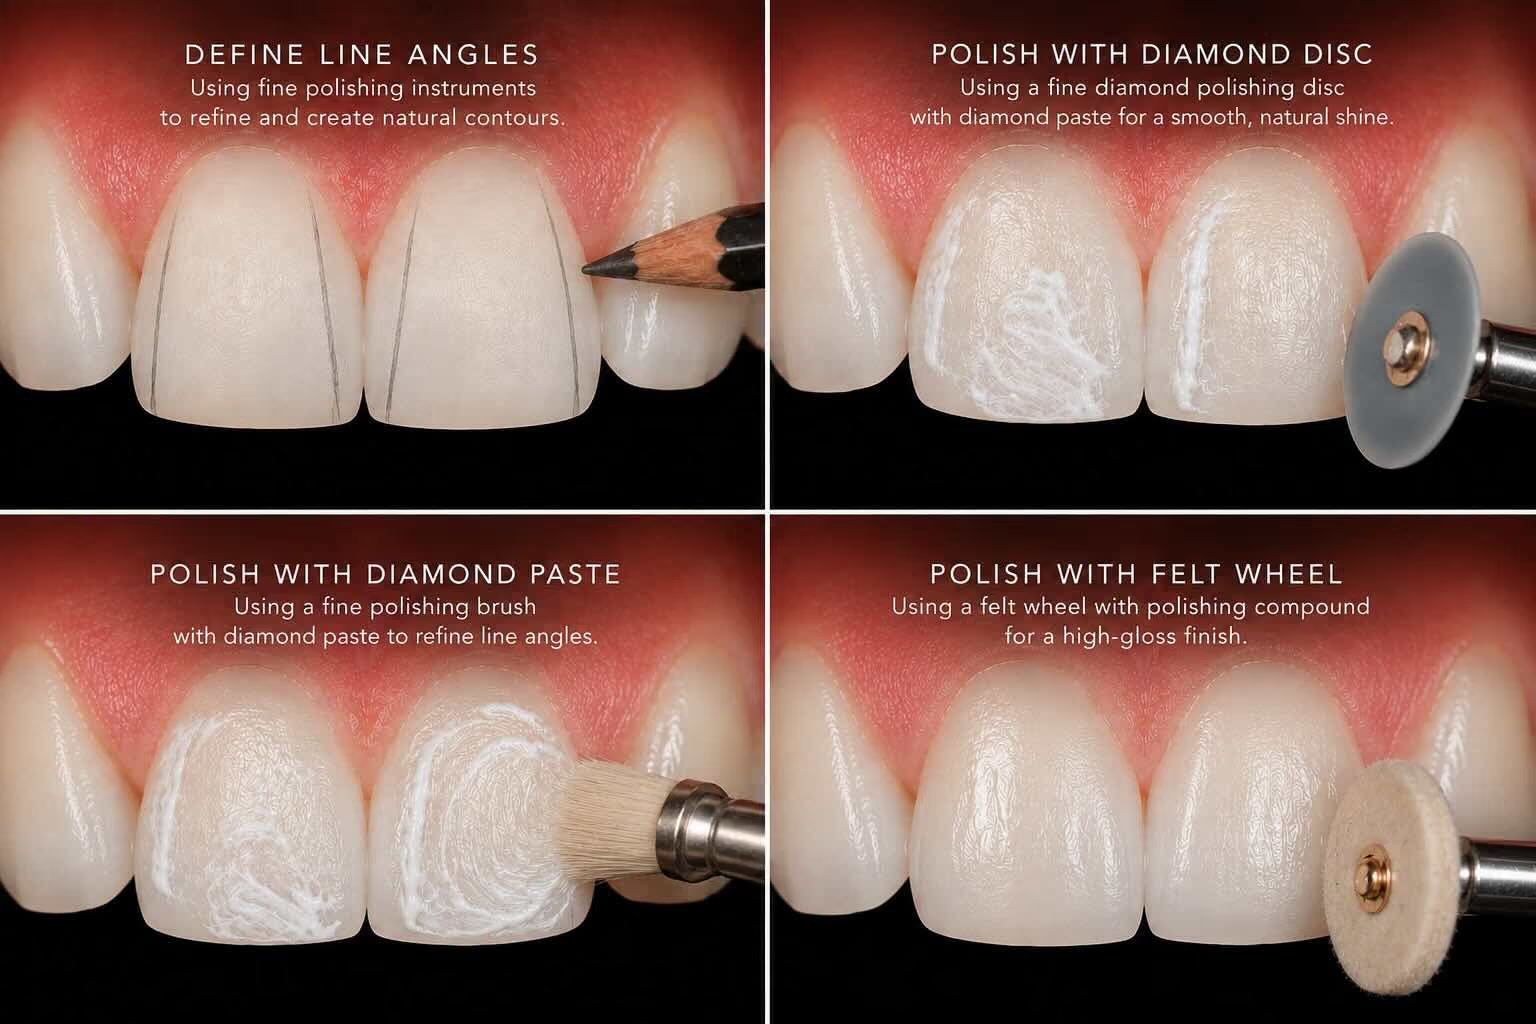
The polishing protocol contributes heavily to the long term stain resistance and colour stability of the restoration. In this case we use colour stable composites in which the final layer is highly polishable (microfill), and we remove the oxygen inhibition layer by using glycerin during the final light cure. This allows our composite bonding to maintain much of its natural appearance over the long term and prevents discoloration.
Nonetheless, the following aftercare is recommended:
These recommendations are supported by clinical research. Long term studies of anterior bonding identify habits such as tooth grinding, smoking and staining beverages as factors that influence how long composite restorations keep their appearance (1).
The space was closed in a single visit while preserving the natural character of the patient's smile, including the imperfections he asked us to keep. No braces, and no drilling of healthy tooth structure.

1. Was dental anesthesia ("freezing") needed? Simple composite bonding cab be performed without dental anesthesia. However, some patients may experience cold sensitivity, for which dental anesthesia can be very effective. In some cases dental anesthesia is heavily recommended. These are full bonding cases involving multiple teeth, or ones in which there are existing restorations which must first be removed before composite bonding is completed.
2. Does the procedure hurt? Most often the procedure is reported as painless. Due to minimal to no tooth removal, any discomfort which is experienced originates from tooth sensitivity following air abrasion and acid etching, and from heat production during composite light curing. Many people find this mildly uncomfortable when they are not anesthetized, and painless when they are anesthetized.
3. Why not do braces or Invisalign? Closing a diastema with orthodontics can be particularly challenging. In this case it would require moving the front teeth toward the midline, which may inadvertently introduce secondary spaces, because this individual's teeth are otherwise already well aligned. It is important to note that in some instances orthodontics is the ideal option. Comparatively, orthodontic treatment can require months to a year, can be more costly, and may require wires, brackets or aligners.
4. Can I do veneers or a crown instead? Yes, veneers or crowns are both possible in this case. However, both would require a greater amount of tooth removal. The research supports composite as a real alternative here. A randomized clinical trial comparing composite and porcelain veneers for diastema closure found no significant difference in survival between the two at two years (4).
5. What do I need to do before bonding my teeth? Composite resins cannot be whitened, consequently bleaching may be performed first. Secondly, any decay should be treated, and if past due, a cleaning appointment completed. In many cases a complete oral exam may be indicated depending upon past assessment by a dentist.
6. How long does composite bonding last? Clinical research on this exact type of procedure is encouraging. A university study following direct composite buildups for diastema closure and reshaping reported a 100% functional survival rate at five years — chips and wear could be repaired rather than replaced — while survival free of any repair was 84.6%, with the large majority of restorations rated good or excellent (1). A separate four year study of diastema closures reported an overall survival rate of about 90% (2). Reviews of anterior composite restorations report annual failure rates in the low single digits (3). Just as importantly, when bonding does chip or stain over the years, it can usually be repaired or repolished rather than replaced. This is one of its major advantages over porcelain.
7. Can I whiten my teeth after? Any tooth whitening should be performed prior to composite bonding not after. Usually, we recommended whitening until the desired shade is achieved, this is followed by a regression period to allow the tooth shade to stabilize, after this composite bonding is completed. The composite will not whiten after it has been placed and cured and if teeth are whitened the bonding will mismatch. This could then require replacement of the bonding.
Please note this case study provides a procedural study on composite bonding with select details specific to this case. For a comprehensive explanation of composite bonding, see A Dentist's Guide on Composite Bonding (coming soon).
Disclaimer: This case study documents a real, individual clinical workflow, shared with written consent. All clinical content is written by Dr. Mandip Puri, DDS. This information is the property of Dr. Puri and Sunny Dental Centre and is not intended for redistribution.
References
Sunny Dental Centre is a general dental practice. Dr. Mandip Puri, DDS, is registered with the Royal College of Dental Surgeons of Ontario as a general practitioner, not a specialist. Individual results vary; what is achievable depends on your teeth, bite and goals.
7 Riverview Drive, Guelph, Ontario, N1E 3R6,
Canada
Mon: 10:00am - 7:00 pm
Tu/W: 8:00am - 5:00 pm
Thur: 9:00am - 4:00 pm
Fri - Sat 9:00 am - 3:00 pm (alternating)